PlayaLabs is 'For Burners, By Burners'. We run tests and trials on-playa. We link to honest reviews and the best prices we can find. We always link to FREE-SHIPPING!
Lab Tests
Featured


PlayaLabs is 'For Burners, By Burners'. We run tests and trials on-playa. We link to honest reviews and the best prices we can find. We always link to FREE-SHIPPING!
Renewable energy will help you Leave-No-Trace and looks good on your camp’s Placement application.
A solar station can be a weedy buggy jungle. But you don’t have to be an electrical engineer. Even a beginner can do the Playalabs’ simple playa-approved tutorial.
It’s not cheap, but it’s do-able (about $250 to $600+). You can use the kit for other events and road trips too!
There are a few ways to skin this cat, but ThePlayaLabs' simplest, quickest kit involves this short list of items:
Deep Cycle Battery
Solar Panel Kit
Inverter w/ cables
Wire strippers
Extra Wire
Gator Clips
We got feedback that our Solar Parts list gave too many options. So we re-did the parts list for your budget and power needs, with 3 kits (High-end, Mid-range, and Budget-Bob).
Storage Battery: Yes you need a battery*
Panel: The sexy part
Electronics: Components and cables
*It’s possible to run a solar panel directly to your electronics, but playa-testing reveals this is unreliable. Sometimes it’s cloudy or dark when you need power. Power output from the panel is “choppy”, which can actually damage your electronics. The battery allows you to capture solar energy when it’s shining and then use power whenever you need it.
The panel gets most of the glory, but the battery really is the heart of the operation.
You need a 12 volt "Deep Cycle” or “Marine" battery.

This is not a regular car battery! Look for the keywords Deep Cycle and/or Marine at auto parts stores or boating stores.
You can get these ones online. These are fucking heavy so bake cookies for your delivery driver.
12V batteries are rated by "Amp-Hours" or AH. That's basically how much juice they hold. More Amp Hours = battery lasts longer. Get the largest Amp-Hour you can afford. This may be a time to buddy-up with campmates to get a larger battery. Ideally you get 100 AH or greater. If you're frugal with power, 50 AH battery can do OK. We don't recommend anything below 50 AH for the Burn. 35 AH is just not enough to make it worthwhile.
A note on TERMinology, the TERM “TERMINALS” means the metal posts on the battery. There is a positive and negative “TERMINAL”. That TERMINATES this paragraph. Stop saying TERM.
The + is Positive and usually Red or White. The - is Negative and usually Black. Avoid touching the terminals. And don’t let objects touch the terminals or you might throw a spark—unlikely but possible, so just be careful, kids.
Make sure you get a panel compatible with a 12 Volt system.
Panels rated 12V or up to 18V are still OK.

But do not use a rooftop panel from a house (for example, sometimes people sell a leftover panel from a home solar setup). That panel would NOT work with our 12V setup, unless you know what you’re doing and check the voltage.
Don’t worry we put some playa-tested panels on our parts page.
Panels are rated by Wattage. Get the largest Wattage you can afford. Budget Bob, if you are weighing your costs on the Battery vs the Panel, it's better to get a larger AmpHour Battery and a smaller panel. Spend more on the Battery and save on the Panel if you have limited budget.
For the panel, get at least 20 Watts for light duty (it'll run a swamp cooler a few hours a day, charge phones, and run LEDs sporadically). Upgrade to a 100W panel if you are hoping to charge many phones, or run more lights, gadgets, speakers etc.
It may sound amazing to get a 500W panel or some ungodly amount of wattage. But you can overwhelm the charge capacity of the battery. So if you have the budget and the desire, get ANOTHER 100W panel, another battery and inverter, and use 2 identical kits. This will get you more useful energy than simply getting a huge panel.
The panel kits we tested come with adapters and charge controller (more on that later). We recommend the kits with these gizmos included—it’s just easier and cheaper than buying it all separately.
If you really want to customize your kit, you need to buy panels, charge controller, and cable adapters separately.
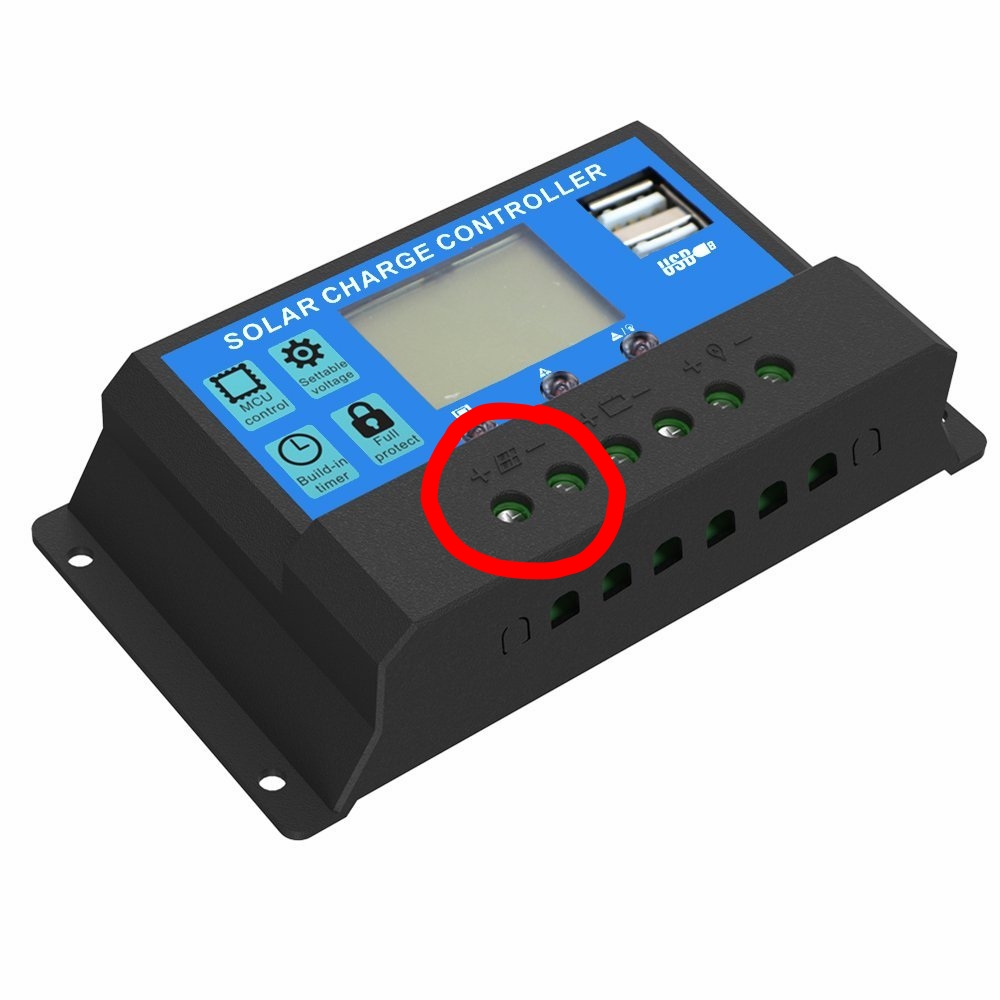
Charge controller: This little box to regulates the flow of energy to protect your gear. Luckily the kits come with this included.
12V wires. 10 gauge, at least 10 ft.
Gator clips. You need at least 2 but get a few backups. If you’re doing a Swamp Cooler, you need 2 more clips.
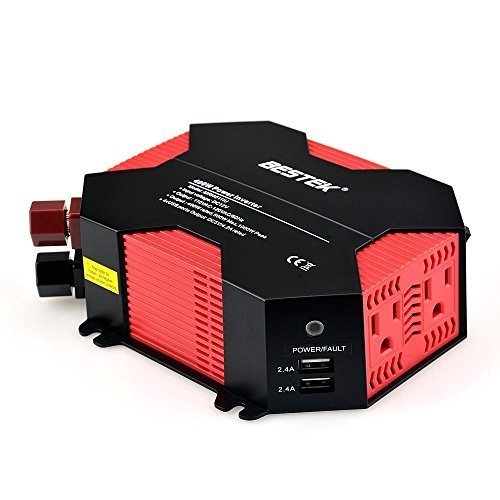
Inverter: A boxy device that makes this whole thing usable.
Inverters are confusing. Let's clear it up:
**If all you are running is a swamp cooler, you do not need an inverter! You can connect directly to the battery terminals. See the other tutorial for getting wired.
The inverter takes power from the battery and transforms it into a usable form for USB gadgets and standard AC plugs.
There are 2 types of inverters: "Modified Sine" or "Pure Sine". For most electronics, the Modified Sine is fine. Your LEDs and USB devices, and phone chargers will be alright. If you have advanced audio equipment, medical devices, laptops, or high tech gadgetry, you may want to spend extra and get a Pure Sine inverter.
The PlayaLabs have listed solar kits with different inverters for various budgets. All of ours have safety-features that some cheaper inverters are missing.
Anytime the solar panel is in the sun, its collecting energy. If the panel is in the sun, the wires will be live! Don’t freak, just be careful.
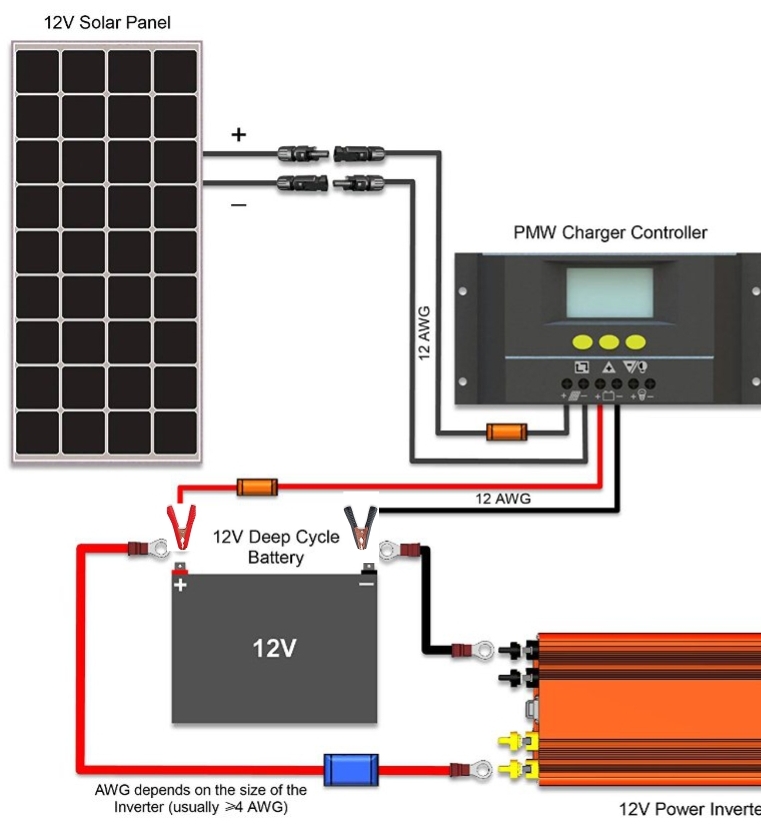
Flip the panel face-down ass-up. There are +Pos and -Neg wires leading from the back of the panel.
If you bought a complete kit w/ charge controller, follow the instructions on connecting the cables. The kits come with good instructions and it’s not hard—connect the 2 cables coming from the panel to the charge controller INPUT. Line up Positive to Positive, and Negative to Negative. Then you connect the second set of cables from the charge controller OUTPUT to the battery terminals.

If you didn’t buy the complete kit with cables, or you need additional help, follow these steps:
On your panel, find the +Pos and –Neg wires. Depending on your kit, you may need cable adapters. Run the +Pos and –Neg wires from the panel into the INPUT slots on the charge controller (labelled with a grid Panel icon), and make sure you match the Positive cable to Positive slot, and Negative to Negative slot.
Next, cut a length of your black and red 12v power wires about 10 feet (you can always shorten it later but best to start with a nice long piece).
On one end of these power wires, strip a half inch of insulation, twist the fibers, and connect the red wire to the +Pos slot of the Charge Controller (the output slots labeled with a square Battery icon), and repeat to connect the black wire to the -Neg slot of the Charge Controller output.

Now, on the loose end of your red and black power wires, strip an inch of the coating from the black and red wires, and crimp the bare wires onto gator clips. Label these Gator Clips with a Sharpee: PANEL TO BATTERY

http://www.metaldetectingworld.com/basic_electrical_wiring_p12.shtml
Clamp the gator clips labeled (PANEL TO BATTERY) onto the 12v battery terminals.
Make sure everything is lined up Red = +Positive; Black = -Negative.
Flip your panel back over and let the sun hit it. The indicator lights on the charge controller should light up indicating the flow of energy.
Congratulations! You just made renewable energy.
Chose the inverter that meets your needs (read above yo!).
The inverter comes with red and black cables and clips. Label these clips "INVERTER". I know we're labelling a lot you'll see why.
Attach the included cables to the inverter (each inverter is a little different, read their instructions how and where to attach).
Clip the INVERTER clips to the battery terminals matching +Pos and -Neg. You may need to adjust the solar panel clips and inverter clips so everything fits on the Terminal. It doesn’t matter which clips go on first, just set it up the most secure way.

Once it’s all connected, turn ON the inverter. The LED on the inverter should turn on and it may “Beep” as it powers up. Plug in your phone charger to the inverter and verify that your phone is receiving a charge. If your inverter keeps beeping, that’s an error message. Detach all cables and try again, make sure all Red/Positive and Black/Negative are lined up properly.
The inverter is a sensitive piece of equipment. It has a built in fan, and needs to be kept out of the sun and dust with some fresh air circulating. You should consider customizing a plastic storage tub or crate to house all the cables and inverter. Something like these, to keep it shaded and make sure drunkees don't kick it or run over it.

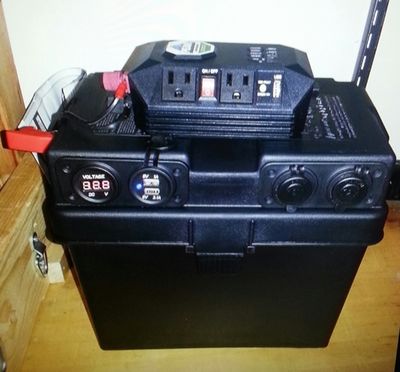
At the very least, make sure the inverter is in the shade and not sitting in a pile of dust. (ie, under a table or car bumper, with some fresh air).
Now you can plug your electronic devices into the inverter, using the USB ports and regular AC outlets.
Just because it has an outlet does not mean you can plug in anything you want! It has limitations and it won’t run a microwave, massive sound system, etc. It will run LEDs, small speakers, and it works well to charge phones and batteries. Understand that your rig has limitations.
Unclip the inverter (or turn off via the remote) when not in use to preserve battery life.
Tell your campmates how to turn off the battery station when not in use!
Unclip the solar panel or put a towel over it before working w/ the wires!
Set up your whole system at home before the burn. Make sure you know how it runs and connects. Label stuff. Make sure it works.
The items linked here all carry warranties so if something doesn’t work, return it.
Everything will run better if you start off with a fully-charged battery. We linked to an inexpensive little charger that is a great help and it will prolong the life of your battery. Worth the investment.
Wipe down the solar panel every day to get rid of the dust! This is very important.
Keep solar panel up high and in the sun (duh!). The top of a vehicle is a good spot. Optional: angle the panel slightly to face the south. This can be as simple as a rolled up towel or 2x4 frame.
Inverter: The Playa-Tested inverters have auto-shutoff features that will turn off when the battery power gets too low (this is to prevent damaging the battery). If this happens, you have to wait for a sunny day. Unclip the inverter from the battery, make sure the solar panel and charge controller are connected properly and clipped to the battery. Let it sit in the sun for a day and recharge without any usage.
Turn stuff off when you leave camp. The inverter drains a little power any time it is connected, so unclip the inverter when you’re not using it. The nicer model has a built in control switch to turn it off without unclipping (very nice).
If you end up running out of power, you can always re-charge the battery the old fashioned way: using a set of jumper cables (you should have this anyway, right?). Attach the Deep Cycle terminals to your vehicle battery, and idle your vehicle for a few hours. This is inconvenient and less-than-ideal, but it’s a suitable backup plan.
Inverter overheating: Your inverter beeps and shuts down. It is probably clogged with dust. Unclip it, blow the dust out of the fan, and put it in the shade to cool down for a few hours. Make sure your battery and inverter setup is in the shade and protected from dust drifts, and gets fresh air.
You may have a blown fuse. Each inverter has a different fuse setup, check the instructions.
You may have too many devices plugged into your inverter. Campmates may have tried to charge massive devices. Unplug everything and slap your campmates.
The playa has a way of making wires come undone. Flip the panel over (or cover with a towel), then trace all the wires and make sure everything is still well-attached and where it should be. Drunk campmates have a habit of knocking wires loose, then reattaching in the wrong location. Proceed with slapping.
You can damage your nice new battery if you run it down too much. So don't leave things plugged into the inverter or running off the battery all night. Don't be a bug, unplug.
The solar rig described here is ideal for the swamp cooler.
Check our new tutorial for Wiring the solar station and integrating your swamp cooler!

Reviews of pitched-tents!
A winner with Playa-ready features